Dance Class Outline
For my intrepid beginning dancers, who catch me on the JoCo Cruise, here is the outline of my first foray into teaching: “Shimmying & Undulating for Beginners”.
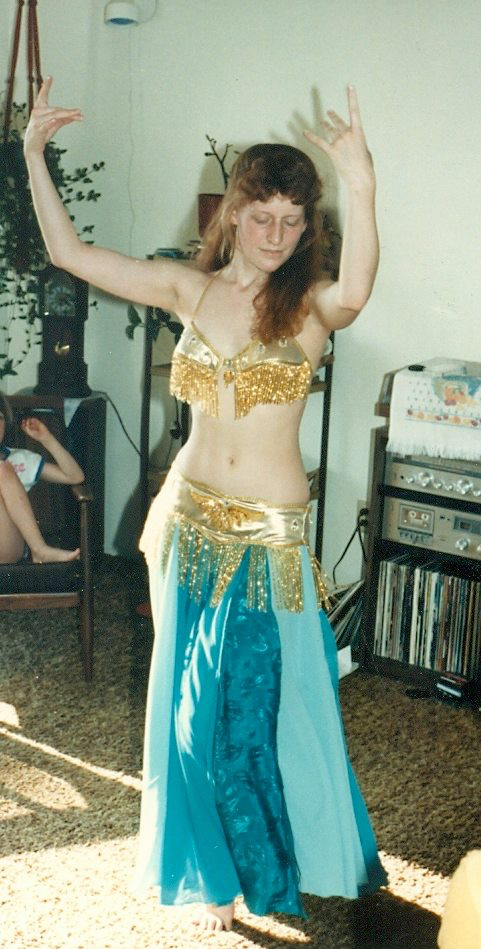
Proof that I used to do this a lot.
Intro: Stay safe and feel good.
Keep your knees loose, and never push a move past what’s comfortable.
Every body is strung together differently, and the same move will look and feel a little different for you than for the next person.
Don’t worry about getting it to look right, until you have gotten familiar with how a move works for you - then you can make adjustments and improvements.
Most people find they have more affinity with either undulating or shimmying - it’s normal to have difficulty at first with at least one of these!
Always warm up with easy movements and stretches before trying a new move.
Have fun with it!
Foundational Move: The Hip Circle
This is a good one to introduce the general principles you’ll need for everything to follow.
Key Positions: Find how your body feels with your hips forward, back, tilted, or shifted to one side or the other.
Weight Transfers: Feel how your weight is distributed between one foot and the other as you move
Transitions: Smooth out movements between one position to another
Isolations: Move one section of your body, while letting the rest stay calm and uninvolved
Learning the Hip Circle
Slide hips from side to side, feeling weight shift, keeping the knees soft, learning to keep the hips level, and the upper body calm.
Tilt the pelvis forward and back, from tucked under to pushed back like a duck, keeping soft knees and feeling the back straighten and arch.
Hit the 4 positions: Side, Tuck, Other Side, Duck in order, then smooth out the transitions between them to create a circle
Try it in the other direction.
Try it very small, and very large!
Yes, the Hip Circle move is pretty much the same as hula hooping, but with a concentration on making a nice smooth circle, rather than having to desperately try to keep a hoop going!
Undulation
This is the trickiest move for most folks. We’ll begin by learning another isolated move.
The Chest Circle:
This process is a lot like the Hip Circle, but most of us have a lot less mobility in our upper bodies, so it will be a more subtle motion.
Begin with these stretches to find your range of motion:
Reach an arm up and over to feel how your rib cage opens up and your spine curves to one side. Repeat on the other side.
Now try pushing your rib cage side to side, keeping your shoulders and hips calm - just curving the spine gently to each side
Push the rib cage forward, arching your back and lifting your chest. Keep your shoulders down and let your pelvis do a Duck.
Collapse your chest inward, curving your back out behind you, and let your pelvis Tuck.
A good way to work on chest flexibility is the “Cat-Cow” stretch, if you’re OK getting down on the floor. On all fours, push your back up like an annoyed cat, then let it slump down, like a cow.
Doing the Chest Circle:
Slide rib cage from side to side, learning to keep the hips and shoulders calm.
Lift your rib cage forward and up, then let it collapse in and down, feeling how your back arches and hunches, and your pelvis ducks and tucks.
Hit the 4 positions: Side, Lift, Other Side, Collapse in order, then smooth out the transitions between them to create a circle
Try it in the other direction.
- This is where I would have added an illustration for undulating, but I couldn’t find anything suitable! —
Stringing Together an Undulation!
Now that we’ve moved the hips and the chest, and learned how those motions work in our bodies, let’s put together a classic undulation.
Step One: Lean a bit forward, and start lifting the chest, and arching the back up until you are leaning back just a little, letting your pelvis do a duck
Step Two: Imagine someone is going to slowly, firmly poke you in the sternum, and then poke lower and lower, in sequence
Step Three: Allow that imaginary poking to send you slowly back toward a Collapse, still leaning a little back, until your chest is down, then your belly will go in and then your pelvis will tuck, letting your chest come back to neutral.
Step Four: Bring your chest slightly forward, and begin to recover into the Chest Lift position, lifting until you’ve stretched your belly back to straight, and you start to lean back a little, your hips going fully into a Duck.
Step Five: That damn poking begins again!
Once you feel the progression of the curves forward and back, you can smooth it out, and speed it up or slow it down, make it subtle or make it big by exaggerating the leaning forward and back. Always keep the knees soft for safety.
You can add more flavor to your undulation by incorporating new directions into it - lift your chest up to the right for one undulation, then lift it up to the left for the next.
You can also do undulations using purely side-to-side motions: alternating slides and lifts of the chest and hips. But I’ll leave that for future exploration!
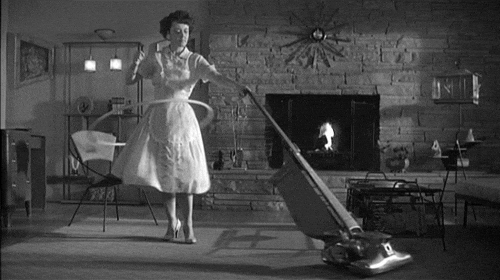
A view of the hip motion underlying a Classic Hip Shimmy. This isn’t exactly a shimmy, but it you can do this, you can shimmy!
Let’s Shimmy!
The Classic Hip Shimmy is the one that almost defeated me as a young dancer. I was an undulator, not a shimmier!
I’ll start by sharing a few variations to get us into the groove: The Fan Shimmy, and what I call the Tina Turner.
The Fan Shimmy works by rotating your hips a bit clockwise, then a bit counterclockwise: imaging your hips are the agitator in an old-school washing machine. This is fairly easy move, and will cause any fringe you wear to fly about in a very satisfying way.
The Tina Turner is an energetic shimmy accomplished by stomping the heels - which looks particularly stunning if the heels are high. Its power comes up from the legs, and the hips are just along for the ride. You can look up Tina’s classic performances and marvel at her stamina and the force of her shimmies.
The Classic Hip Shimmy is quite different from either of these, because its motivator is the upper glute muscles. You can even do it sitting down, unlike the variations above, and in fact, that’s what cracked the puzzle for me. I had to learn to shimmy sitting on my butt. Either on the floor, or in a chair, try shifting from one side of your butt to the other - think of “walking” on your sit-bones - while letting your legs stay limp. Think of how a puppy wags its tail.
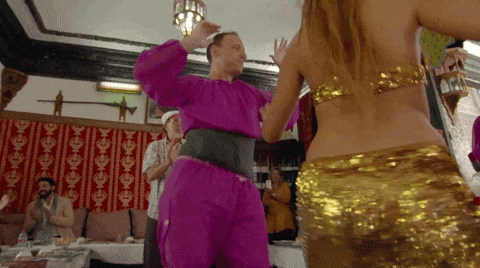
As you get the feel of using your lower back, upper butt to swing your hips in this wagging/shaking way, try doing it more and more quickly, making the move as small and fast as you can. Keep it out of your legs, and experiment with leaning a bit one way and another. When you do this shaking movement quickly enough, and feel free enough with it, it can become a quivering motion, and with practice you will be able to do this move on your feet, on one foot, while walking, even lying down, however the mood strikes you. As with all of these moves, you can do it big and slow (see GIF above), or tiny and subtle.
Fringe, beads, sequins or jingle coins can really help to sell this one!
Other Fun Moves
I have no idea how long it takes to teach the moves above, so I’m including some supplementary material!
Shoulder Circles: The name says it. Learn the up, down, forward and back movements with each shoulder. String those together into circles, feeling the difference between a forward circle (back, up, front, down) and a back circle (forward, up, back, down). Try doing alternating back circles - one with the right shoulder then one with the left, and learn to do them as one unified movement, where the right shoulder is moving back and down, while the left shoulder is moving forward and up.
Snake Arms: Once you have linked Shoulder Circles, you are ready to try Snake Arms. Start with one arm held out to the side, and as you do a back circle, let your elbow bend a little up and then down, following naturally from the shoulder movement. Feel the flow in your arm, and see how your wrist can follow along after the elbow. Shoulder-Elbow-Wrist. Keep your fingers together, and see if you can let the wave flow through your hand: Shoulder-Elbow-Wrist-Knuckles-Fingers. You Hand should be rising up, while your shoulder is already on the way down again. Get the motion going with both arms, and then do them in alternation, linking the shoulder circles.
Hip Lifts and Drops: A classic staple of Middle Eastern Dance, these moves involve lifting, or dropping, one hip. If you put most or all of your weight onto one foot, it can free up the other hip for a larger range of motion. You can treat your hip like a pencil, drawing shapes in the air: lines up or down, circles, arches! Try hitting the upper or lower position right on the beat, for maximum effect.
Have fun dancing!