Dance Class Outline
I finally attempt to pass along some of the dance and movement I’ve learned over the years. Enjoy this primer on some basic Middle Eastern-inspired moves.
For my intrepid beginning dancers, who catch me on the JoCo Cruise, here is the outline of my first foray into teaching: “Shimmying & Undulating for Beginners”.
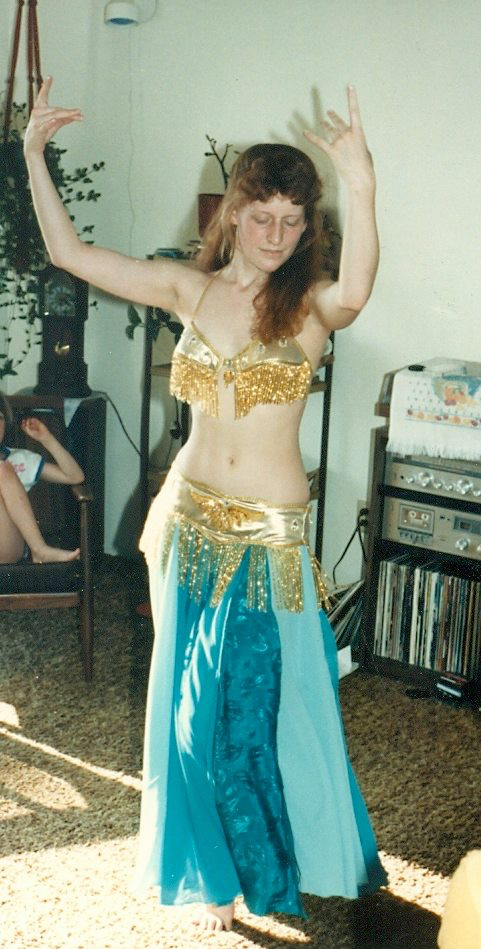
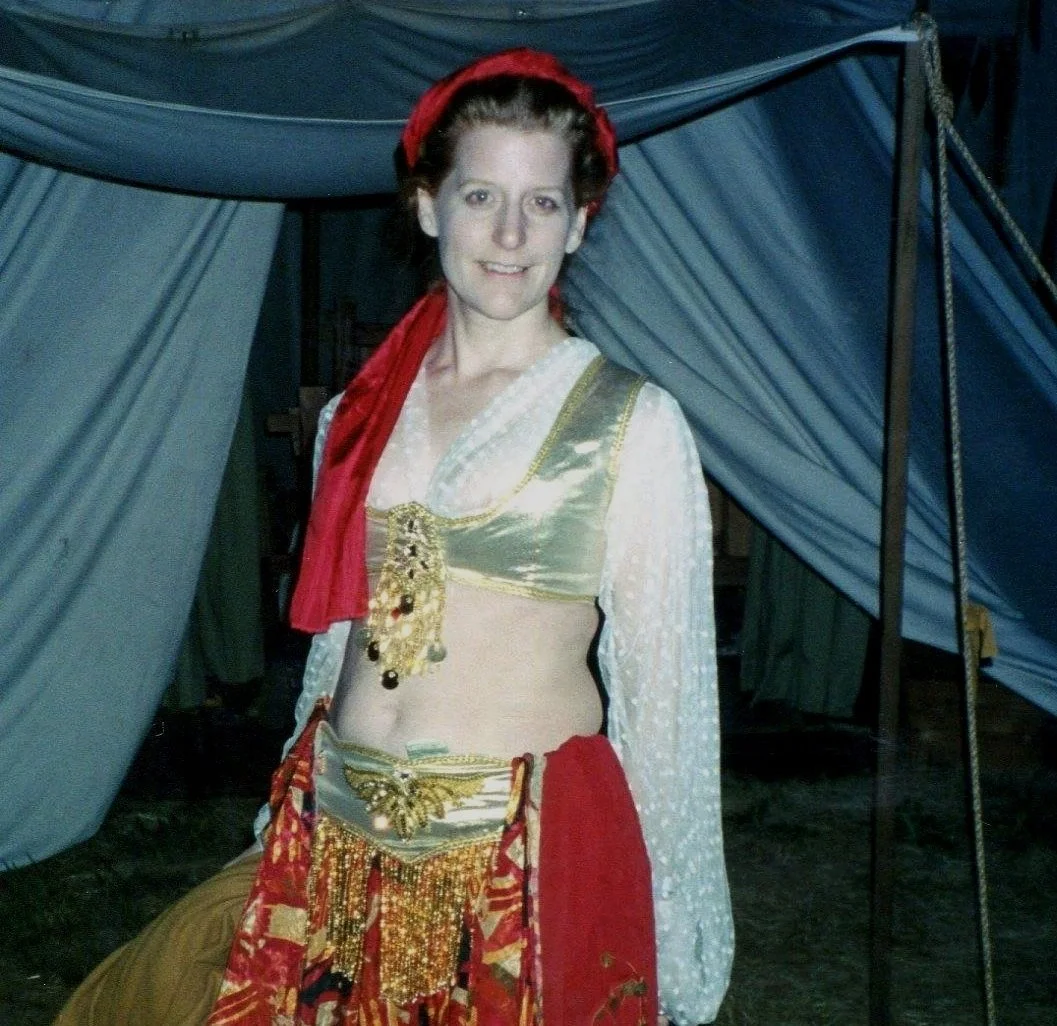
Proof that I used to do this a lot.
Intro: Stay safe and feel good.
Keep your knees loose, and never push a move past what’s comfortable.
Every body is strung together differently, and the same move will look and feel a little different for you than for the next person.
Don’t worry about getting it to look right, until you have gotten familiar with how a move works for you - then you can make adjustments and improvements.
Most people find they have more affinity with either undulating or shimmying - it’s normal to have difficulty at first with at least one of these!
Always warm up with easy movements and stretches before trying a new move.
Have fun with it!
Foundational Move: The Hip Circle
This is a good one to introduce the general principles you’ll need for everything to follow.
Key Positions: Find how your body feels with your hips forward, back, tilted, or shifted to one side or the other.
Weight Transfers: Feel how your weight is distributed between one foot and the other as you move
Transitions: Smooth out movements between one position to another
Isolations: Move one section of your body, while letting the rest stay calm and uninvolved
Learning the Hip Circle
Slide hips from side to side, feeling weight shift, keeping the knees soft, learning to keep the hips level, and the upper body calm.
Tilt the pelvis forward and back, from tucked under to pushed back like a duck, keeping soft knees and feeling the back straighten and arch.
Hit the 4 positions: Side, Tuck, Other Side, Duck in order, then smooth out the transitions between them to create a circle
Try it in the other direction.
Try it very small, and very large!
Yes, the Hip Circle move is pretty much the same as hula hooping, but with a concentration on making a nice smooth circle, rather than having to desperately try to keep a hoop going!
Undulation
This is the trickiest move for most folks. We’ll begin by learning another isolated move.
The Chest Circle:
This process is a lot like the Hip Circle, but most of us have a lot less mobility in our upper bodies, so it will be a more subtle motion.
Begin with these stretches to find your range of motion:
Reach an arm up and over to feel how your rib cage opens up and your spine curves to one side. Repeat on the other side.
Now try pushing your rib cage side to side, keeping your shoulders and hips calm - just curving the spine gently to each side
Push the rib cage forward, arching your back and lifting your chest. Keep your shoulders down and let your pelvis do a Duck.
Collapse your chest inward, curving your back out behind you, and let your pelvis Tuck.
A good way to work on chest flexibility is the “Cat-Cow” stretch, if you’re OK getting down on the floor. On all fours, push your back up like an annoyed cat, then let it slump down, like a cow.
Doing the Chest Circle:
Slide rib cage from side to side, learning to keep the hips and shoulders calm.
Lift your rib cage forward and up, then let it collapse in and down, feeling how your back arches and hunches, and your pelvis ducks and tucks.
Hit the 4 positions: Side, Lift, Other Side, Collapse in order, then smooth out the transitions between them to create a circle
Try it in the other direction.
- This is where I would have added an illustration for undulating, but I couldn’t find anything suitable! —
Stringing Together an Undulation!
Now that we’ve moved the hips and the chest, and learned how those motions work in our bodies, let’s put together a classic undulation.
Step One: Lean a bit forward, and start lifting the chest, and arching the back up until you are leaning back just a little, letting your pelvis do a duck
Step Two: Imagine someone is going to slowly, firmly poke you in the sternum, and then poke lower and lower, in sequence
Step Three: Allow that imaginary poking to send you slowly back toward a Collapse, still leaning a little back, until your chest is down, then your belly will go in and then your pelvis will tuck, letting your chest come back to neutral.
Step Four: Bring your chest slightly forward, and begin to recover into the Chest Lift position, lifting until you’ve stretched your belly back to straight, and you start to lean back a little, your hips going fully into a Duck.
Step Five: That damn poking begins again!
Once you feel the progression of the curves forward and back, you can smooth it out, and speed it up or slow it down, make it subtle or make it big by exaggerating the leaning forward and back. Always keep the knees soft for safety.
You can add more flavor to your undulation by incorporating new directions into it - lift your chest up to the right for one undulation, then lift it up to the left for the next.
You can also do undulations using purely side-to-side motions: alternating slides and lifts of the chest and hips. But I’ll leave that for future exploration!

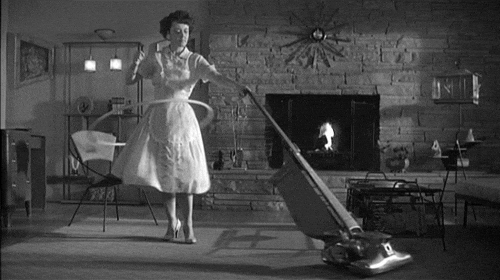
A view of the hip motion underlying a Classic Hip Shimmy. This isn’t exactly a shimmy, but it you can do this, you can shimmy!
Let’s Shimmy!
The Classic Hip Shimmy is the one that almost defeated me as a young dancer. I was an undulator, not a shimmier!
I’ll start by sharing a few variations to get us into the groove: The Fan Shimmy, and what I call the Tina Turner.
The Fan Shimmy works by rotating your hips a bit clockwise, then a bit counterclockwise: imaging your hips are the agitator in an old-school washing machine. This is fairly easy move, and will cause any fringe you wear to fly about in a very satisfying way.
The Tina Turner is an energetic shimmy accomplished by stomping the heels - which looks particularly stunning if the heels are high. Its power comes up from the legs, and the hips are just along for the ride. You can look up Tina’s classic performances and marvel at her stamina and the force of her shimmies.
The Classic Hip Shimmy is quite different from either of these, because its motivator is the upper glute muscles. You can even do it sitting down, unlike the variations above, and in fact, that’s what cracked the puzzle for me. I had to learn to shimmy sitting on my butt. Either on the floor, or in a chair, try shifting from one side of your butt to the other - think of “walking” on your sit-bones - while letting your legs stay limp. Think of how a puppy wags its tail.
As you get the feel of using your lower back, upper butt to swing your hips in this wagging/shaking way, try doing it more and more quickly, making the move as small and fast as you can. Keep it out of your legs, and experiment with leaning a bit one way and another. When you do this shaking movement quickly enough, and feel free enough with it, it can become a quivering motion, and with practice you will be able to do this move on your feet, on one foot, while walking, even lying down, however the mood strikes you. As with all of these moves, you can do it big and slow (see GIF above), or tiny and subtle.
Fringe, beads, sequins or jingle coins can really help to sell this one!
Other Fun Moves
I have no idea how long it takes to teach the moves above, so I’m including some supplementary material!
Shoulder Circles: The name says it. Learn the up, down, forward and back movements with each shoulder. String those together into circles, feeling the difference between a forward circle (back, up, front, down) and a back circle (forward, up, back, down). Try doing alternating back circles - one with the right shoulder then one with the left, and learn to do them as one unified movement, where the right shoulder is moving back and down, while the left shoulder is moving forward and up.
Snake Arms: Once you have linked Shoulder Circles, you are ready to try Snake Arms. Start with one arm held out to the side, and as you do a back circle, let your elbow bend a little up and then down, following naturally from the shoulder movement. Feel the flow in your arm, and see how your wrist can follow along after the elbow. Shoulder-Elbow-Wrist. Keep your fingers together, and see if you can let the wave flow through your hand: Shoulder-Elbow-Wrist-Knuckles-Fingers. You Hand should be rising up, while your shoulder is already on the way down again. Get the motion going with both arms, and then do them in alternation, linking the shoulder circles.
Hip Lifts and Drops: A classic staple of Middle Eastern Dance, these moves involve lifting, or dropping, one hip. If you put most or all of your weight onto one foot, it can free up the other hip for a larger range of motion. You can treat your hip like a pencil, drawing shapes in the air: lines up or down, circles, arches! Try hitting the upper or lower position right on the beat, for maximum effect.
Have fun dancing!

THOUGHTS ABOUT KICKSTARTER

The Doge’s mailbox…that face makes you think twice.
(originally published on December 7, 2014 - minor updates for 2020)
People often ask me for advice when they’re considering using Kickstarter. I’m happy to oblige. I don’t think any of this information is “secret”. The reason someone should pay me real money to consult on their Kickstarter is so that I can provide personalized help that looks at their particular product, cost structure and marketing approach. With that in mind, here’s some general advice, followed by an example that digs into some of the math. It’s derived from correspondence I had with someone considering a book project, so that informs the general thrust of it.
My Advice
Should you do it? Don’t launch a Kickstarter until you are confident that you have engaged with at least some kind of network who will help you get the word out. It may be “free” to run a failed Kickstarter, but only if you don’t count the time, and indeed money, you have to put into promoting it–a decent video can make or break a campaign–and the favors you’ll be calling in, asking everyone you know to make posts on your behalf around the internet. That’s your social capital, so don’t waste it!
Production Costs: Don’t guess. Find out how much it will cost to produce your product. If you’re making a book, printers will give you estimates, but you need to work out your desired format–they can’t do that for you. Decide what page size, page count, and range of quantities works for your project. For example, 1000 copies is the barest minimum for offset printing, and that’s going to look very expensive per unit, since most of the cost is in press set-up. The unit cost will look much better with each 1000 additional copies you order. But, if you only need 1000 copies, don’t be fooled by that lower “unit cost”. You’re paying for the entire press-run, up front, and you will only recoup costs when you actually sell the books! For very small print runs, I advise looking into print-on-demand solutions. If you are only selling directly to retail customers, those can be very cost-effective.
Pricing: If you intend to sell your item to stores and distributors, you will have to do so at a large discount, plus you will be expected to absorb the cost of shipping. You’ll need to set your retail price high enough that you can make a profit on all of those sales.
In the comic and game industries:
Retail stores pay ~50% of the cover price (and you pay the shipping).
Distributors pay ~40% of the cover price (and you pay the shipping). Diamond Comics in particular require goods to only be sent via certain types of carrier, which are not the cheapest available.
In these industries, the rule of thumb is that your landed production costs must stay below 20% of your retail price to be viable, and 10%-15% is much safer.
Setting Your Goal: When it comes time to set the goal for your campaign, the math is far from simple. You need to raise enough that you still have something left over after the following:
~8-10% is kept by Kickstarter & payment processing
You’ve paid your production bills in full, including freight
You’ve paid for any premiums (stickers, t-shirts, etc.)
You’ve packed up and mailed all of the backer rewards
You’ve paid the income tax on the profit you made
You’ve paid any sales taxes required for your locality (and quite possibly others)
Premiums:
Don’t underestimate the cost of producing them, especially in small quantities
Don’t underestimate the time needed to produce them, especially in large quantities
Don’t promise anything you don’t have a thought-out production plan for
If you are offering anything hand-crafted, ONLY include it in limited-quantity reward levels, so you don’t overcommit yourself
Don’t underestimate possible difficulties in shipping & handling (and customs, if you ship overseas).
There are much lower costs associated with printed matter vs. just about anything else
Don’t offer anything breakable, unless you’ve got a really big safety margin (Coffee mugs, I’m looking at you).
Stretch Goals: Be wary of what I call “campaign creep”. During a successful crowdfunding campaign, supporters will clamor for stretch goals. It’s wise to have a few additional pledge levels or minor products or projects planned, so that they can be announced to keep enthusiasm up. But often requests for “stretch goals” become requests for additional premiums to be provided to backers at no additional cost to them. In the heat of the moment, these requests may seem reasonable. While it’s true that–generally speaking–profit margin per customer will increase with scale, that margin can easily be wiped out, or reversed, by adding even seemingly simple new rewards. It is far too easy to underestimate the additional time, work, storage space and handling charges required for each new thing. It’s a slippery slope that can lead to “Death by Kickstarter”.
In summary: I don’t advise people to go onto Kickstarter until they have a reasonable expectation of success. If you have a sufficient number of loyal, excited followers, who express an interest in having your product, and their direct purchases would come close to covering the cost of your desired production run, then you’ve got a good launchpad. You have a good shot at expanding your audience, and funding a profitable product.
So What Does This Wind Up Looking Like?
I’ve written up an example Kickstarter, showing the cash and profit results for someone planning a hypothetical $10,000 print run of small format art books. It’s all round numbers, for the sake of the example. Research the exact costs for your particular situation!
Doing the Math
An artist wishes to print 2000 books, which can be sourced for $5 a piece. They plan to sell some of them into retail channels afterwards, and have good reason to believe that retailers or distributors will be willing to purchase. To make that feasible, they have set their retail price at $30. Basic cost research:
$10,000 to the printer (plus $500 freight for 50 cases of 40 books – one partial pallet – delivered to the artist’s home)
$5 minimum shipping for each domestic backer (USPS printed matter only, mailed in padded envelopes).
Overseas backers would cost much more, and will be excluded from this example. In practice, the up-charge for international shipping should be calculated to cover something close to the worst-case scenario, since there is no way of predicting the mix of countries backers will live in. (Update: most campaigns now choose to charge S&H afterwards, in a full-functioned pledge manager, so that full calculations can be made based on exact backer addresses).
Note that these costs do not include paying anyone to label, weigh, take packages to the post office, etc. We’re assuming that the quantity will be low enough for the artist to do this themselves. In assessing this, the artist should take all of that time into consideration when deciding whether the project is worthwhile. Just because something does not require cash does not make it free!
Let’s assume the artist asks for a minimum of $14,000 and makes it by a small margin, getting these quantities of backers:
20 people throw in $5, for no reward
50 people throw in $15 for a small premium (e.g. a pack of art postcards)
300 people throw in $30, for the book at “retail” (but shipping is included)
100 people throw in $50, for a book plus two premiums
The raw pledges come to $14,850 which goes to the following places:
KS and Amazon keep $1485
Printing comes to $10,500
Postage and supplies comes to $2,350
Premiums cost around $150 (postcards, cheap)
$14,850 – $14,485 = $365 cash on hand (assuming the artist had some other way to pay their bills). For tax purposes, they are showing a profit of $8365. They’ve sold 400 books, so the Cost of Goods on the book sales came to $2000. The other $8000 (1600 books) becomes inventory–an asset. The cost of those goods is only recorded as they are sold (or given away in promotions, or–heaven forbid–thrown out as unsaleable at a later date).
Now let’s look at what happens if we double the the numbers of backers across the board. In that scenario, the total pledges come to $29,700
KS and Amazon keep $2970
Printing still only comes to $10,500
Postage and supplies comes to $4700
Premiums cost around $200 (postcards – still cheap!)
In this case, the artist will have $11,330 cash on hand afterwards, and show a profit for tax purposes of $17,330. Afterwards, they hold an inventory of 1200 books, worth $6000 as an asset.
For this artist, it looks like a $10,000 book print run translates into the need to raise more than $20,000 in raw Kickstarter support, if they want to have any compensation for their own work, and to have a decent amount of cash on hand when the dust clears. They should set their minimum requirement on that basis, unless they have other sources of funds in starting up their publishing business. And they will need to do one other set of numbers, to check for safety: what happens if their book is a runaway hit? The unit cost of the books will be reduced, but the moment the artist doesn’t have room in their home to receive and process the mailing, they will encounter both storage and fulfillment costs. Also, they may be tempted to invest more of the excess cash into inventory (i.e. print more books, because it is so “popular”), but if they do not already have the structure in place to handle selling to stores and distribution once the kickstarter is done, that might not be wise. The extra books may just languish.
Please feel free to contact me, and ask more questions!

HANDLING LICENSING REQUESTS

Thomas Dillon Jewelers, in Galway, Ireland. Words to live by.
(originally published on July 17, 2014)
A friend recently asked me for advice on handling requests from people who either want him to participate in a project, or want to license his IP for their projects. Here’s a generalized version of my advice.
The first step is to think about what categories the proposed projects fall into, and assess each, looking at these factors:
1) Is this a category of thing that appeals to you, and hopefully a significant portion of your fans?
2) Have you recently done something else in this category, or have something pending or ongoing in this category, and therefore don’t need another one that is so similar?
3) Are the people approaching you capable professionals, with experience in that category, who can do justice to the project?
4) Will the project associate you with other brands/products, and are they ones you want to be associated with?
If a project passes this initial “is it generally a good idea” bar, then you get to dive into a further assessment:
1) Does the project provide enough financial or promotional benefit to be a good use of your time? (If a project is tiny, it had better be a tiny time-commitment, too!)
2) Is the financial proposal fair to both parties? (You want everyone involved to be getting the proper incentives.)
If you’ve gotten that far, and still want to say “yes”, there you go! Make sure to get everything written down, and signed, and then you’ll have less trouble down the road.
On the other hand, sometimes you really need to turn someone down.
That will eat up not just some of your time, but also emotional energy figuring out how to communicate with them. It could also cost you some good will, if they get bent out of shape that you didn’t jump into their project. But you can’t let that sway you into doing a project, if it’s not a good fit.
It can be useful to have someone – an agent or business manager – who can say “no” for you, so that you (the talent) aren’t the one turning people down. You want to have the luxury of being nice, and saying, “gosh, we’ll look at that, but my business manager knows what my schedule is, and what other projects and contractual obligations I have, so I can’t just say yes”. Then you pass the person along to your representative, and you’re not the one who rejected them. People may start approaching your agent instead of you. Depending on how you set up the relationship there, you can either have them pass everything through to you for approvals, or give them guidelines, and let them screen out the people who are definitely not a good fit without taking up any of your time.
If you can’t rope somebody else into being your filter or hatchet person, you can still have responses ready to hand, starting with a simple, “No, but thank you for asking.” If you must give more detail, stick with “My schedule is quite full, so I wouldn’t be able to put in the time this would require” or “I’m committed to a number of projects already, and some of them would overlap too closely with this”. There’s never a reason to say, “Oh lord, your thing looks awful” or “It sounds like you’re expecting me to do all the work.”
I have learned to stay as straightforward as possible when saying “no”. If you give someone a detailed reason, that can push them into sales mode, where they will try to “answer your objections.” That in turn can lead to a protracted back-and-forth, and more potential for people’s feelings to get hurt. Keep it simple and firm, and make sure you’re respecting your own time.